How to setup your Cloud Server securely
- Prime Stake Pool

- Feb 4, 2022
- 12 min read
Updated: Sep 17, 2024

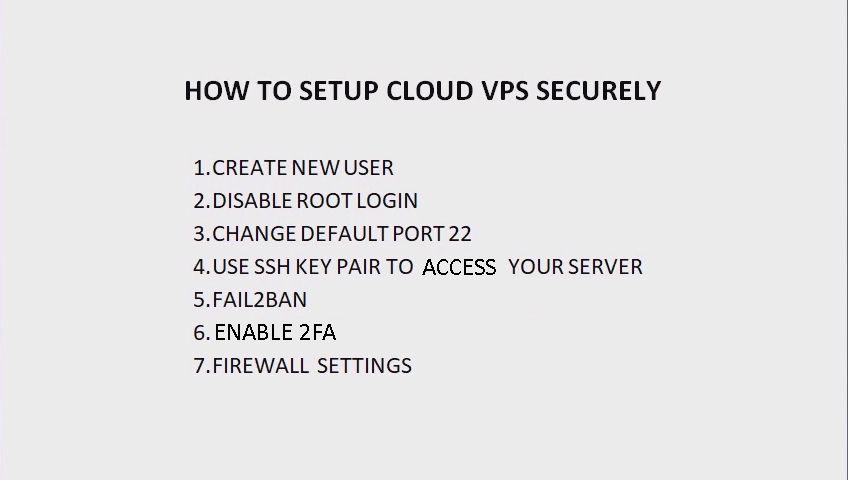
To run any node i.e. Cardano node or Ethereum validator on cloud server you first need to setup the server securely. To setup the server securely these are the following seven settings I have sorted out and found to be the most important settings.
I am having double boot operating system with Ubuntu 20.04LTS and Microsoft Windows 10 Pro 64 Bit as my operating systems. I prefer Ubuntu as my preferred operating system for running the node server. For this setup guide I will use Windows PowerShell to access the cloud server running on Ubuntu 20.04 LTS. I use my local Ubuntu OS to access only my Cardano nodes.
First go to any cloud service provider and create an instance/server. Then from your local computer use SSH client to connect your remote cloud server. The default login/username is always 'root'. At this stage you also must have root password to login to your remote server. So the CLI format to connect your remote server is:
ssh root@<ip address of your remote server>
PS C:\WINDOWS\System32> ssh root@5.189.149.230

You will see the following message once while connecting to your remote server. Type yes and press enter to accept it.

Server IP address is added to the list of known host. Now enter password to get access to your remote cloud server.


So now we are logged in to our remote server with root password. This method of accessing server is not secure and we need to change it by disabling root login and password that we will see later.
Create new user
Now among the seven layers of security first we will see how to create a new user.

First check user login with command 'whoami'.
root@vmi547465:~# whoami
root

So we are logged in as user 'root'. Now let's create a new user as our first layer of security.
root@vmi547465:~# adduser rocket
Adding user 'rocket' ...
Adding new group 'rocket' (1000) ...
Adding new user 'rocket' (1000) with group 'rocket' ...
Creating home directory '/home/rocket' ...
Copying files from '/etc/skel' ...
Now here since I re-created user 'rocket' after deleting it, so I got the following mesage:
The home directory '/home/rocket' already exists. Not copying from '/etc/skel'.
If you are creating new user for the first time then you won't see the above message.
Now create password for the new user rocket.
New password:

Retype new password:
passwd: password updated successfully
Changing the user information for rocket
Enter the new value, or press ENTER for the default
Full Name[]:

Full Name[]:
Room Number []:
Work Phone []:
Home Phone []:
Other []:
Now if the information provided is correct then accept it with 'y' and press enter.

So now we have created the user 'rocket' with required information. Now let's give root privileges to the user 'rocket' with the following command:
root@vmi547465:~# usermod -aG sudo rocket

Now let's switch to new user 'rocket' with the command:
root@vmi547465:~# sudo su - rocket
root@vmi547465: $ whoami
rocket

Logged in as user 'rocket', now let's check if root privileges is given to user 'rocket' or not with the following command:
root@vmi547465: $ sudo whoami
[sudo] password for rocket:
root

Use SSH key pair to access your server
Now logged in as user 'rocket' let's check all the files/folder including hidden.
rocket@vmi547465: $ ls -a
.bash_history .bash_layout .bashrc .cache .local .profile .sudo_as_admin_successful
You can see that their is no folder names '.ssh'. We need to create '.ssh' folder under user 'rocket' to keep the rsa public key.

First we need to create rsa key pair (public/private) on our local computer. The necessary steps are on the documentation provided below.
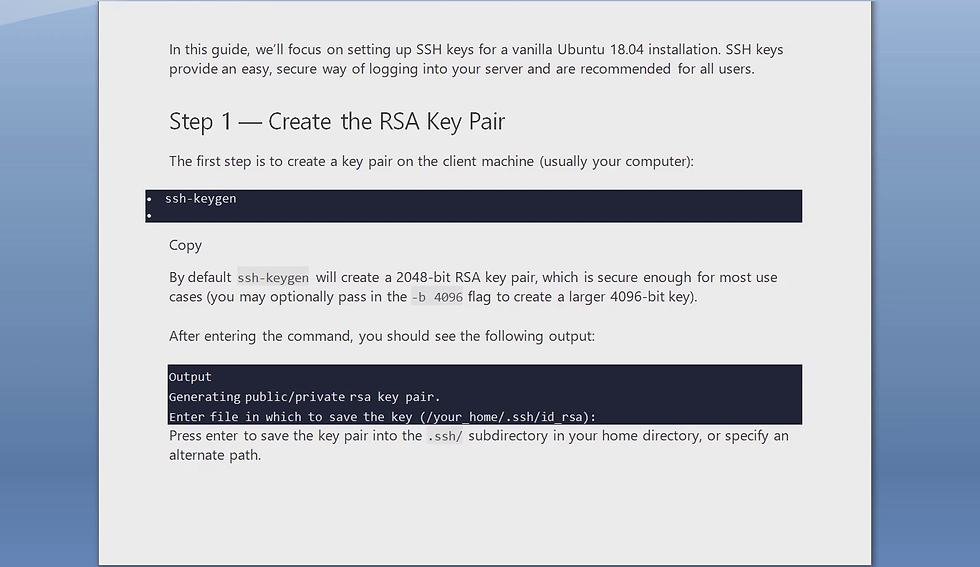
The steps involved are as follows:
Open windows PowerShell as admin.
PS C:\WINDOWS\system32> ssh-keygen
Generating public/private rsa key pair.
Enter file in which to save the key (C:\Users\anupa/.ssh/id_rsa):
Enter passphrase (empty for no passphrase):
Enter same passphrase again:
Your identification has been saved in C:\Users\anupa/.ssh/id_rsa.
Your public key has been saved in C:\Users\anupa/.ssh/id_rsa.pub.
Here you must note two important things. You must not change the default path for saving the rsa key pair. '.ssh' folder will be automatically created under the user. Also you must create passphrase for your rsa key pair. In windows PowerShell passphrase is asked every time you access your remote server. But in Ubuntu passphrase is asked only once for the first time when you access your remote server.

Now let's check the rsa public key on your local computer with command:
cat ~/.ssh/id_rsa.pub
PS C:\WINDOWS\system32> cat ~/.ssh/id_rsa.pub
The output will be your rsa public key displayed on screen.


This rsa public key displayed on your local computer also need to be copied to your remote computer to establish a secure connection via ssh. There are various methods to do so:
1) Copying Public Key Using ssh-copy-id
2) Copying Public Key Using SSH
3) Copying Public Key Manually
Windows PowerShell does not support all the commands. Methods 1 and 3 may not work on PowerShell but it will definitely work on Ubuntu. Here we will be using method 2 on PowerShell. For details on all the methods you can check the tutorial here.

So by method 2 use the following command on your local computer to copy the rsa public key to your remote computer:
PS C:\WINDOWS\system32> cat ~/.ssh/id_rsa.pub | ssh username@remote_host "mkdir -p ~/.ssh && touch ~/.ssh/authorized_keys && chmod -R go= ~/.ssh && cat >> ~/.ssh/authorized_keys"
Enter your username and remote server ip address on 'username@remote_host'. Here we use 'rocket@5.189.149.230'


You need to enter password of your remote server with user/login as 'rocket'.

Also you need to enter passphrase for the rsa public key on your local computer.
You are now logged in as user 'rocket' on your remote server

Now let's check the hidden files and folders with command:
rocket@vmi547465:~$ ls -a
.bash_history .bash_layout .bashrc .cache .local .profile .ssh .sudo_as_admin_successful

Now let's check contents of the folder .ssh :
rocket@vmi547465:~$ cd .ssh
rocket@vmi547465:~$ ls
authorized_keys
rocket@vmi547465:~$ sudo nano authorized_keys
This is the same key as in you local computer 'rsa.pub'.

Disable root login, password and change default port 22
Now let us disable root login and password. For this first go to folder 'ssh' then edit file 'sshd_config'
rocket@vmi547465:~$ cd /etc/ssh
rocket@vmi547465:/etc/ssh$ sudo nano sshd_config

Here we will change the following parameters:
1) port 22
2) PermitRootLogin yes
3) PasswordAuthentication yes
Remember to remove the hash sign before each parameters to take effect.

First change the 'PermitRootLogin yes' to 'PermitRootLogin no'

Then add a line just below it 'AllowUsers rocket'. You can add as many users you want. Just give a space between each users.

Now change the 'PasswordAuthentication yes' to 'PasswordAuthentication no'

Change the default port 22 through which ssh connection has been made to some other port in the range 1024 - 32767. Here we choose our Port as 1234. Then use (^O) to write out/ save the parameters and then (^X) to exit.

Then you must restart the service for the change in parameters to take effect.
rocket@vmi547465:~$ sudo systemctl restart ssh

Now check the status with the command:
rocket@vmi547465:~$ sudo systemctl status ssh

It may take some time to show the updated status. Note over here that the server is now listening to port 1234.

Now if you try to connect with 'root' as user it wont work, as it is disabled. So from now on we connect user as 'rocket' with the command:
PS C:\WINDOWS\system32> ssh rocket@5.189.149.230 -p 1234
Here we put '-p 1234' at the end of the command as the default port 22 has been changed.

So we have covered up to four security layers in setting up your server:
1) Create new user
2) Disable root login
3) Change default port 22
4) Use SSH key pair to access your server
Now we will proceed with the remaining three security layers:
5) Install fail2ban
6) Enable 2fa authentication as an additional layer of security
7) Firewall Settings

Enable Two-Factor Authentication
SSH can also be configured to require a Google Authenticator code, which means that an attacker that somehow compromised your SSH key and its passphrase would still need the device with the authenticator app on it (presumably your phone). This adds an extra layer of security to your system.
WARNING
We strongly recommend that you open a second terminal with an SSH connection to your node, just in case you misconfigure something. This way, you will have a backup that is still connected in case you lock yourself out, so you can easily undo your mistakes.
If you do manage to lock yourself out, you will need to physically access your node via its local monitor and keyboard to log in and repair the misconfiguration.
Start by installing Google Authenticator (or a compatible equivalent) on your phone if you don't already have it. For Android users, consider andOTP which is an open-source alternative that supports password locking and convenient backups.
Next, install the Google Authenticator module on your node with this command:
Copy
sudo apt install -y libpam-google-authenticatorNow tell the PAM (pluggable authentication modules) to use this module. First, open the config file:
Copy
sudo nano /etc/pam.d/sshdFind @include common-auth (it should be at the top) and comment it out by adding a # in front of it, so it looks like this:
Copy
# Standard Un*x authentication.
#@include common-auth
Next, add these lines to the top of the file:
Copy
# Enable Google Authenticator
auth required pam_google_authenticator.so
Then save and exit the file with Ctrl+O, Enter, and Ctrl+X.
Now that PAM knows to use Google Authenticator, the next step is to tell sshd to use PAM. Open the sshd config file:
Copy
sudo nano /etc/ssh/sshd_configNow change the line KbdInteractiveAuthentication no to KbdInteractiveAuthentication yes so it looks like this:
Copy
# Change to yes to enable challenge-response passwords (beware issues with
# some PAM modules and threads)
KbdInteractiveAuthentication yes
(Older versions of SSH call this option ChallengeResponseAuthentication instead of KbdInteractiveAuthentication.)
Add the following line to the bottom of the file, which indicates to sshd that it needs both an SSH key and the Google Authenticator code:
Copy
AuthenticationMethods publickey,keyboard-interactive:pamThen save and exit the file with Ctrl+O, Enter, and Ctrl+X.
Now that sshd is set up, we need to create our 2FA codes. In your terminal, run:
Copy
google-authenticatorFirst, it will ask you about time-based tokens. Say y to this question:
Copy
Do you want authentication tokens to be time-based: yYou will now see a big QR code on your screen; scan it with your Google Authenticator app to add it. You will also see your secret and a few backup codes looking like this:
Copy
Your new secret key is: IRG2TALMR5U2LK5VQ5AQIG3HA4
Your verification code is 282436
Your emergency scratch codes are:
  29778030
  86888537
  50553659
  41403052
  82649596
NOTE
Record the emergency scratch codes somewhere safe in case you need to log into the machine but don't have your 2FA app handy. Without the app, you will no longer be able to SSH into the machine!
Finally, it will ask you for some more parameters; the recommended defaults are as follows:
Copy
Do you want me to update your "/<username>/.google_authenticator" file: y
Do you want to disallow multiple uses of the same authentication token: y
By default... < long story about time skew > ... Do you want to do so: n
Do you want to enable rate-limiting: y
Once you're done, restart sshd so it grabs the new settings:
Copy
sudo systemctl restart sshdWhen you try to SSH into your server with your SSH keys, you should now also be asked for a 2FA verification code, but not for a password.
Fail2Ban
Fail2Ban is the security layer in which you reduce the number of attempts from the unknown ip's trying to break in to your server. This is done by setting up the following parameters in the file 'jail.conf'. That includes:
#ignoreip = 127.0.0.1/8 ::1
#bantime = 10m
#findtime = 10m
#maxretry = 5m
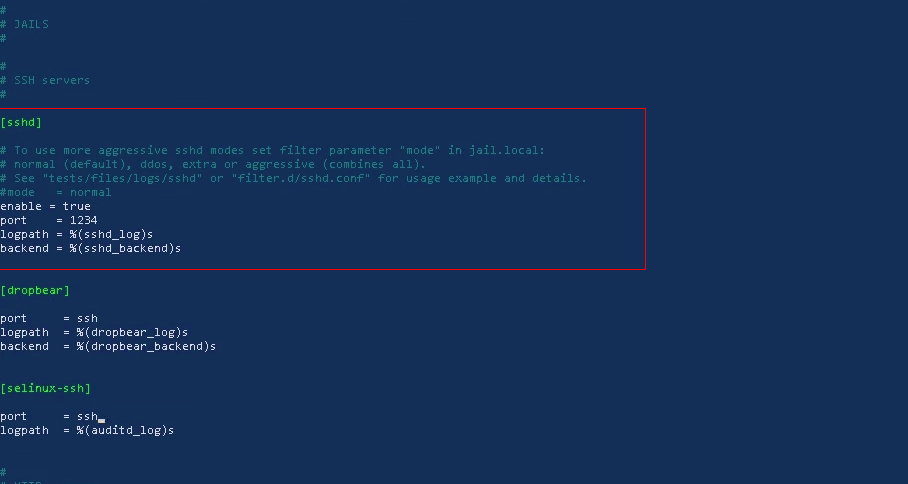
[sshd]
Remember to remove hash # before each parameter to take effect.
Now let's install fail2ban:
rocket@vmi547465:~$ sudo apt install fail2ban

rocket@vmi547465:~$ cd /etc/fail2ban
rocket@vmi547465:/etc/fail2ban$ ls
action.d fail2ban.conf fail2ban.d filter.d jail.conf paths-arch.conf paths-common.conf paths-debian.conf paths-opensuse.conf

Lets see the contents of the file 'jail.conf'.


We need to change the parameters in the file 'jail.conf'. But if we do so, then while updating the Ubuntu system packages the file gets overwritten and restored to its default settings. For this not to happen we need to cp 'jail.conf' to 'jail.local'.
cp jail.conf jail.local

Now lets change the parameter in the file 'jail.local'.
sudo nano jail.local

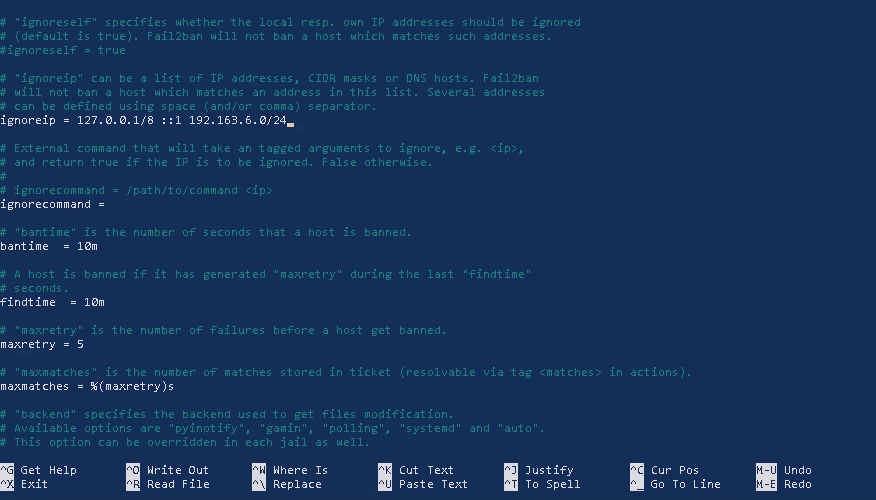
In 'ignoreip' just put your local computer ip address with a space after '127.0.0.1/8 ::1 '.
ignoreip = 127.0.0.1/8 ::1 192.163.6.4
ignoreip = 127.0.0.1/8 ::1 192.163.6.4/24
ignoreip = 127.0.0.1/8 ::1 192.163.6.4/32
Also put '/24' after your local computer's ip address if you don't want ip's coming from your local network to get banned and put '/32' if you don't want network having single IPv4 address to get banned. For details about IPv4 CIDR blocks visit wikipedia page here.

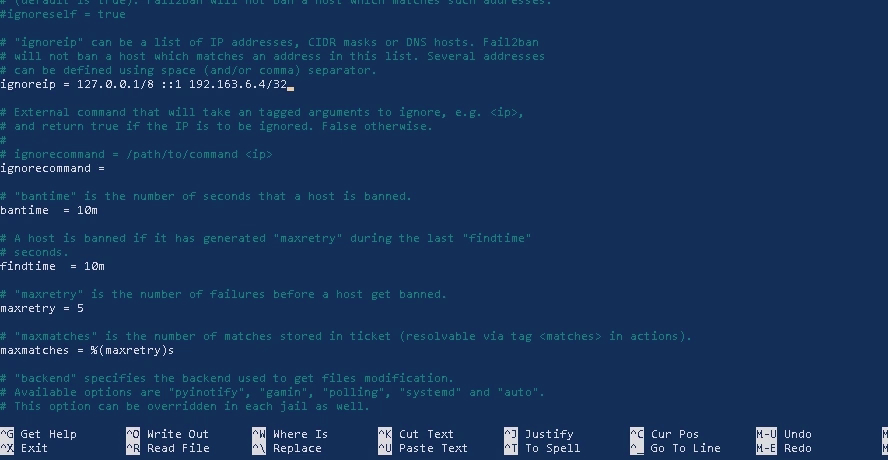
Keep bantime, findtime, maxretry to default settings i.e. bantime = 10m findtime = 10m maxretry = 5m as it is sufficient to keep the bad actors away from re-attempting to break into your server.
Under [sshd] enter line 'enable = true' and change the port to your ssh port. If it is port 22 then you can simply keep it as 'ssh'.
Restart fail2ban for settings to take effect
sudo systemctl restart fail2ban
Firewall rules
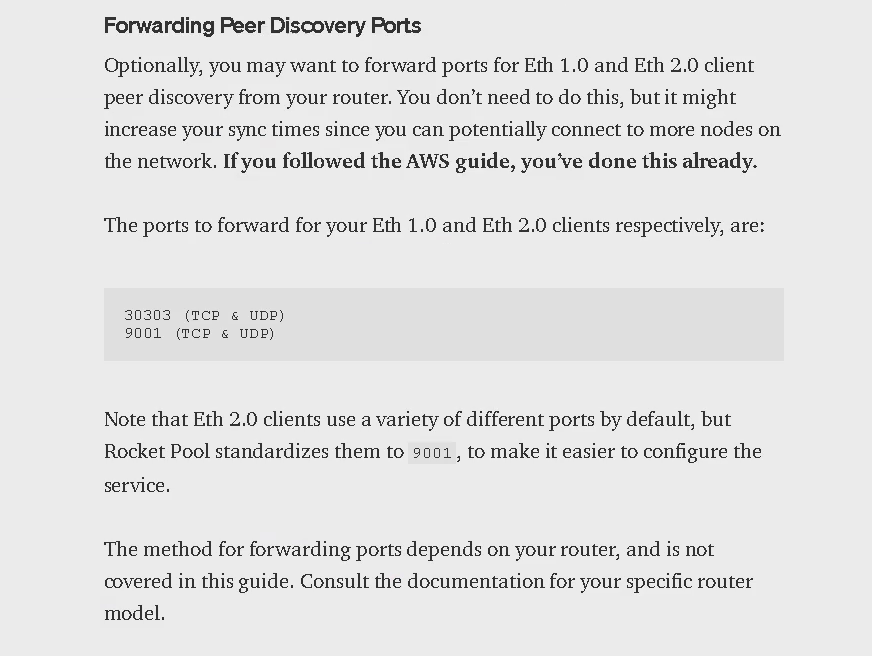
Finally let us define the firewall rules for our server. For running Ethereum node you need to open port 30303 (TCP & UDP) and 9001 (TCP & UDP).
You can set up the firewall rules for your cloud server on your cloud service provider platform. But I personally prefer setting up using 'ufw' through command line interface. First let us check the status of the firewall.
rocket@vmi547465:~$ sudo ufw status verbose
stauts: inactive
By default firewall is setup with 'deny incoming' and 'allow outgoing'. Now you can first define the firewall rules and then enable it or enable it first and then define the firewall rules. But I personally prefer defining firewall rules first and then enable it. Let's first open the ssh port 1234 and then ports for the Ethereum node.
rocket@vmi547465:~$ sudo ufw allow 1234/tcp
Rules updated
Rules updated (v6)
rocket@vmi547465:~$ sudo ufw allow 30303/tcp
Rules updated
Rules updated (v6)
rocket@vmi547465:~$ sudo ufw allow 9001/tcp
Rules updated]
Rules updated (v6)]
rocket@vmi547465:~$ sudo ufw enable
Command may disrupt existing ssh connection. Proceed with operation (y/n)? y
Firewall is active and enabled on system startup
Always remember to first change the default port 22 through which ssh connection has been made to port 1234 in 'sshd_config' file then only you must open port 1234 for incoming in ufw firewall settings, otherwise you may end up with trouble logging in to your server.

Hardware key authentication
Hardware key authentication for your server is the additional layer of security where you put that hardware key into the usb port of your local computer and you are asked to provide the key while trying to logging in to your remote server. The security keys like Yubi key and Google Titan security key are most used. I don't have any security key with me so I cannot show you how to setup the hardware key for your cloud server. I will try to manage the latest version of Yubi key and will add a section under 'Node Setup Basics' on 'How to set up hardware security key for your cloud server'.
Enable Two-Factor Authentication
SSH can also be configured to require a Google Authenticator code, which means that an attacker that somehow compromised your SSH key and its passphrase would still need the device with the authenticator app on it (presumably your phone). This adds an extra layer of security to your system.
WARNING
We strongly recommend that you open a second terminal with an SSH connection to your node, just in case you misconfigure something. This way, you will have a backup that is still connected in case you lock yourself out, so you can easily undo your mistakes.
If you do manage to lock yourself out, you will need to physically access your node via its local monitor and keyboard to log in and repair the misconfiguration.
Start by installing Google Authenticator (or a compatible equivalent) on your phone if you don't already have it. For Android users, consider andOTP which is an open-source alternative that supports password locking and convenient backups.
Next, install the Google Authenticator module on your node with this command:
sudo apt install -y libpam-google-authenticator
Now tell the PAM (pluggable authentication modules) to use this module. First, open the config file:
sudo nano /etc/pam.d/sshd
Find @include common-auth (it should be at the top) and comment it out by adding a # in front of it, so it looks like this:
# Standard Un*x authentication.
#@include common-auth
Next, add these lines to the top of the file:
# Enable Google Authenticator
auth required pam_google_authenticator.so
Then save and exit the file with Ctrl+O, Enter, and Ctrl+X.
Now that PAM knows to use Google Authenticator, the next step is to tell sshd to use PAM. Open the sshd config file:
sudo nano /etc/ssh/sshd_config
Now change the line KbdInteractiveAuthentication no to KbdInteractiveAuthentication yes so it looks like this:
# Change to yes to enable challenge-response passwords (beware issues with
# some PAM modules and threads)
KbdInteractiveAuthentication yes
(Older versions of SSH call this option ChallengeResponseAuthentication instead of KbdInteractiveAuthentication.)
Add the following line to the bottom of the file, which indicates to sshd that it needs both an SSH key and the Google Authenticator code:
AuthenticationMethods publickey,keyboard-interactive:pam
Then save and exit the file with Ctrl+O, Enter, and Ctrl+X.
Now that sshd is set up, we need to create our 2FA codes. In your terminal, run:
google-authenticator
First, it will ask you about time-based tokens. Say y to this question:
Do you want authentication tokens to be time-based: y
You will now see a big QR code on your screen; scan it with your Google Authenticator app to add it. You will also see your secret and a few backup codes looking like this:
Your new secret key is: IRG2TALMR5U2LK5VQ5AQIG3HA4
Your verification code is 282436
Your emergency scratch codes are:
29778030
86888537
50553659
41403052
82649596
NOTE
Record the emergency scratch codes somewhere safe in case you need to log into the machine but don't have your 2FA app handy. Without the app, you will no longer be able to SSH into the machine!
Finally, it will ask you for some more parameters; the recommended defaults are as follows:
Do you want me to update your "/<username>/.google_authenticator" file: y
Do you want to disallow multiple uses of the same authentication token: y
By default... < long story about time skew > ... Do you want to do so: n
Do you want to enable rate-limiting: y
Once you're done, restart sshd so it grabs the new settings:
sudo systemctl restart sshd
When you try to SSH into your server with your SSH keys, you should now also be asked for a 2FA verification code, but not for a password.
Read this technical documentation on gitbook here
You can also see the youtube video on ‘How to setup Cloud Server securely’ here


We now post such technical documentation on GitBook. The Blog post is kept only for general stuff.